opencv+python机读卡识别(进阶版)
在 上一篇文章(初级版) 中,我们初步介绍了扫描机读卡的识别,
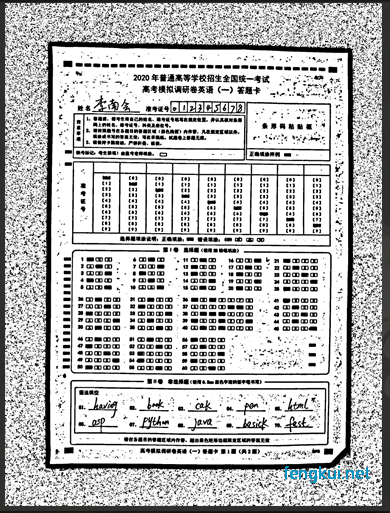
在这篇文章中,我们进一步机读卡的识别,
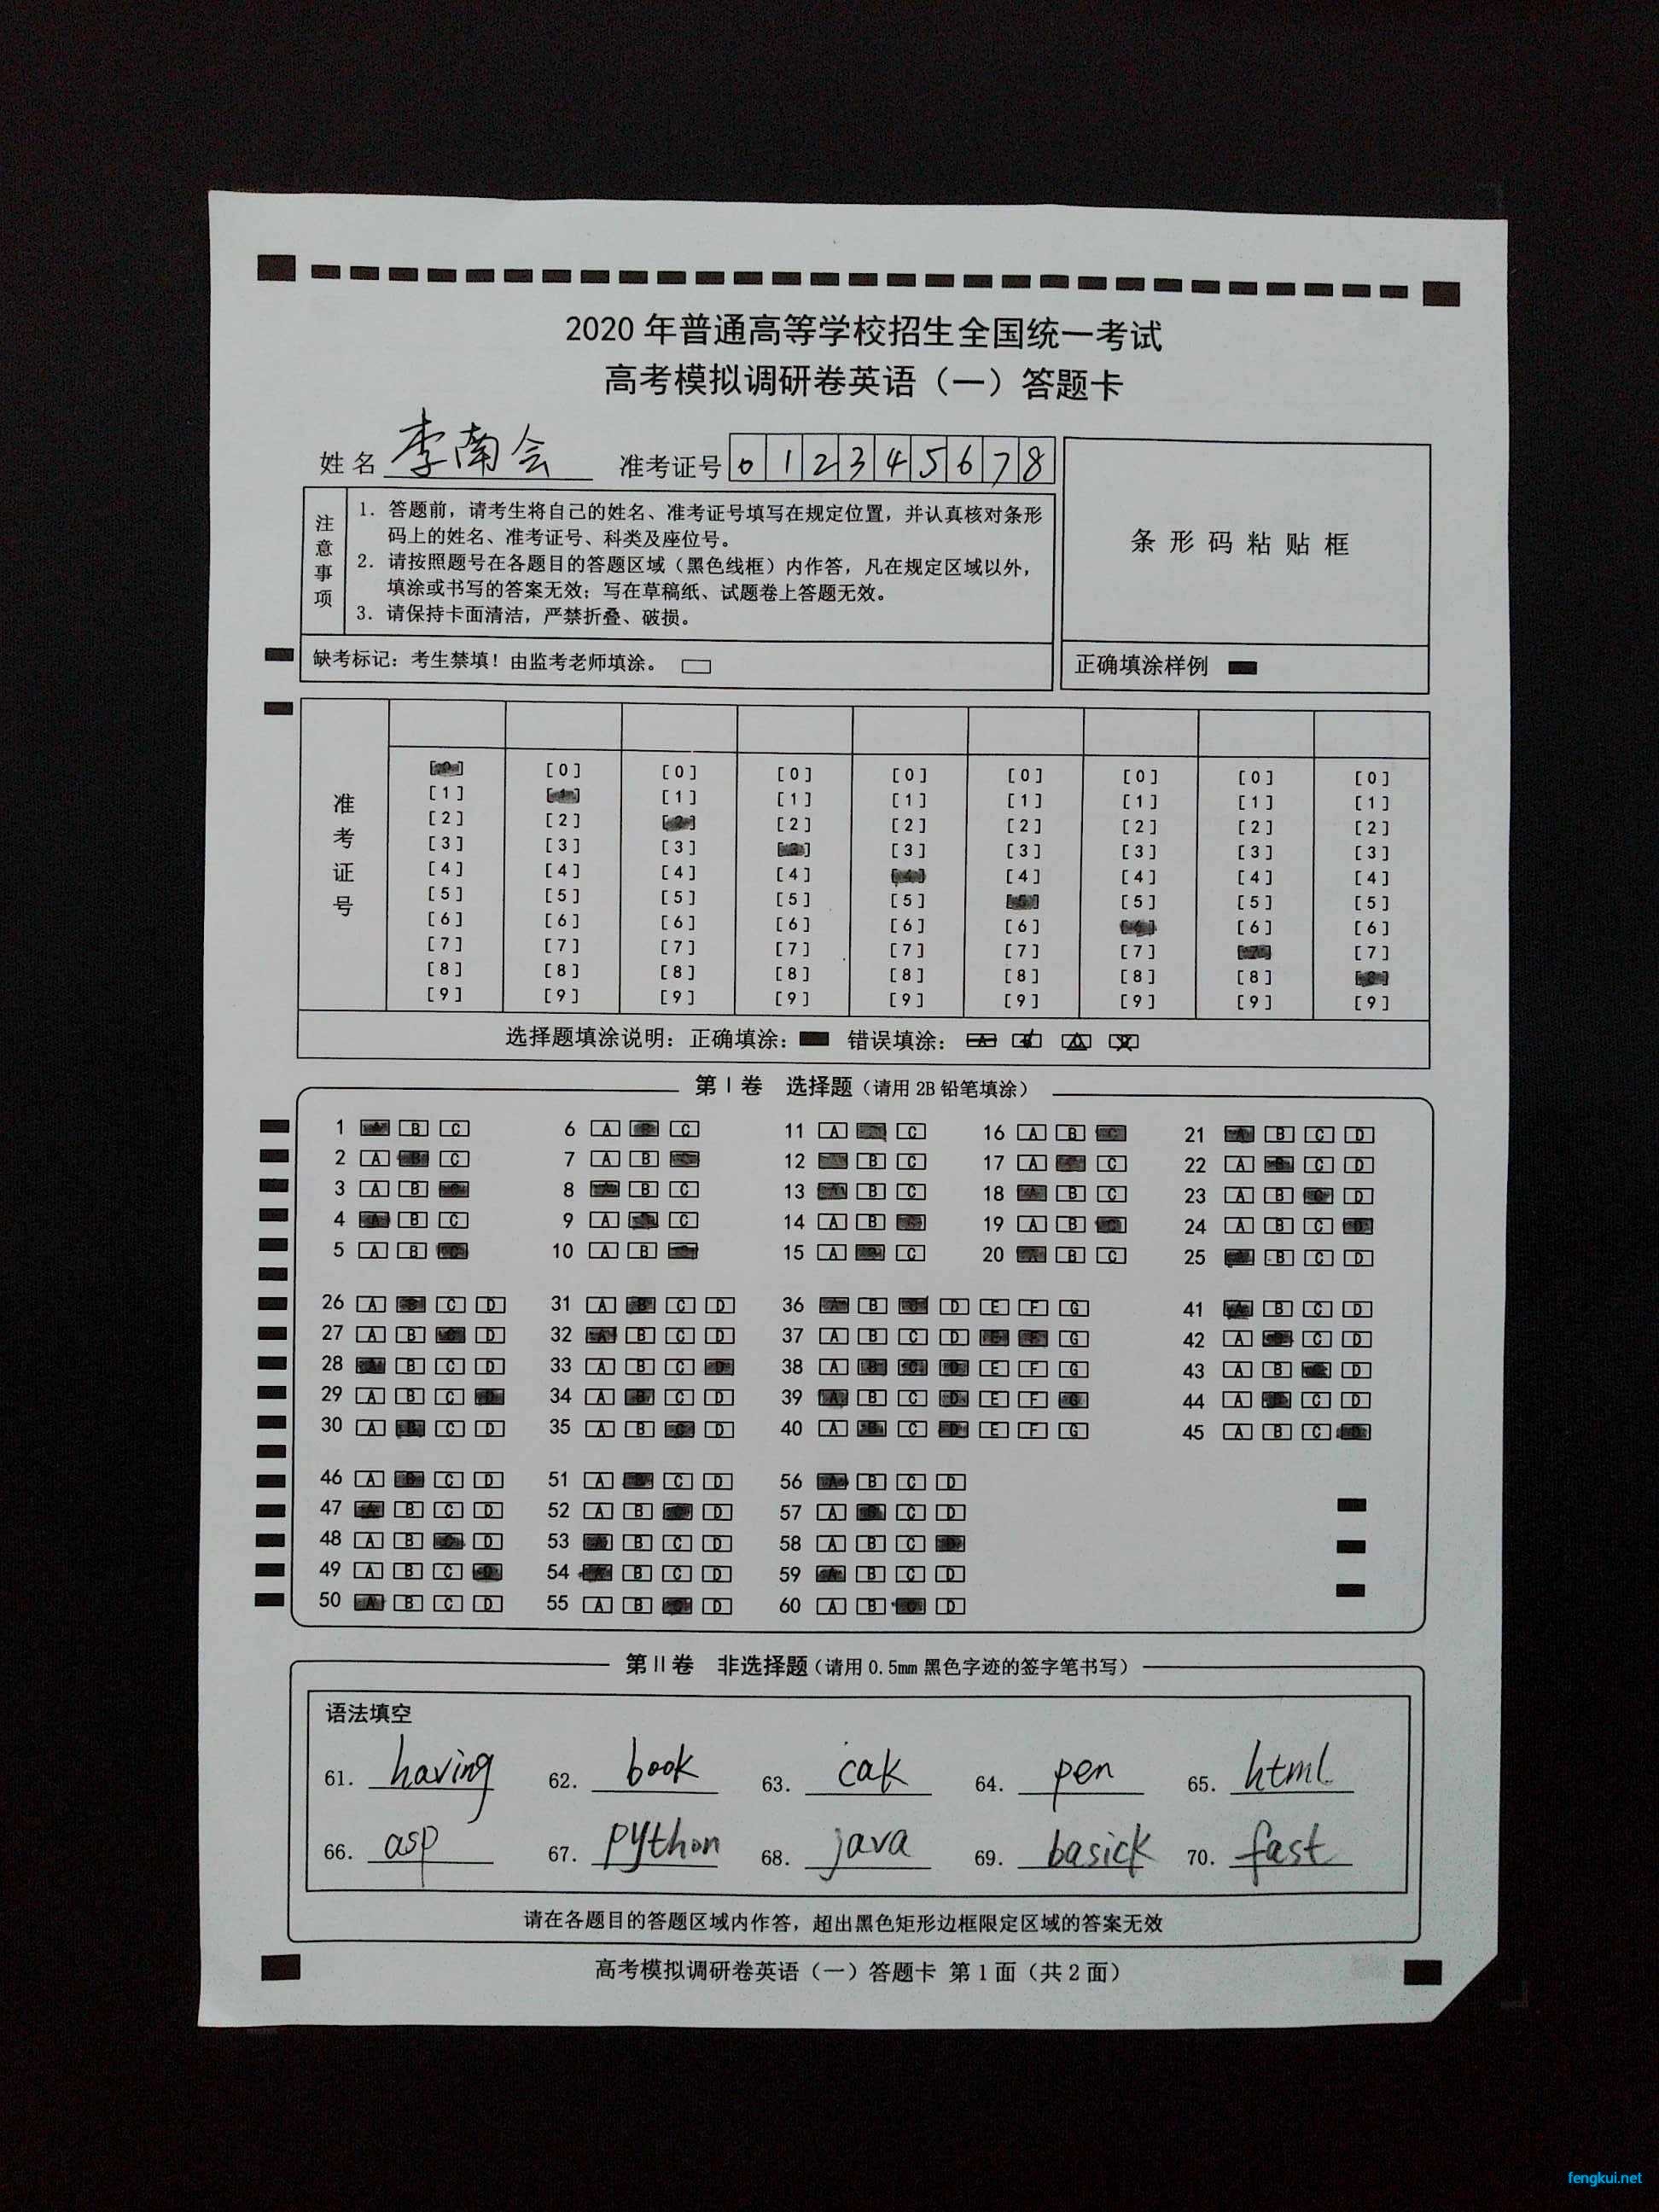
在这里,我们使用高拍仪的图片进行识别,
进一步讲解封装类库,如何打开文件夹,获取文件目录,
边缘检测、四点变化裁切、识别结果保存excel等操作。
当然,熟悉相关业务流程可直接跳过流程,看(最终版),
本地使用环境(win10 64位,python3.7)
一、读取相对目录文件(获选则读取目录)
import os
import re
from tkinter import filedialog
import win32api,win32con

class cardReading(object):

    # 获取目录下的文件
    def print_all_file_path(self, init_file_path, keyword='jpg'):
        url = []
        for cur_dir, sub_dir, included_file in os.walk(init_file_path):
            if included_file:
                for file in included_file:
                    if re.search(keyword, file):
                        url.append(cur_dir + "/" + file)
        return url

if __name__=="__main__":
    cardReading = cardReading()
    url = cardReading.print_all_file_path("./card");
    url = [];
    if len(url) == 0:
        Folderpath = filedialog.askdirectory()  # 获得选择好的文件夹
        url = cardReading.print_all_file_path(Folderpath);
        print(url)

    if len(url) > 0:
        for x in range(0,len(url)):
            print(url[x])
    else:
        win32api.MessageBox(0, "未选择识别目录", "提醒", win32con.MB_OK)
二、循环文件,进行图片的初步操作(灰阶,轻度模糊,二值化处理)
1、从选择的目录下的文件进行,循环识别操作
    if len(url) > 0:
        for x in range(0,len(url)):
            # print(url[x])
            aaaa = cardReading.reading(url[x], x)
            print(aaaa)
    else:
        win32api.MessageBox(0, "未选择识别目录", "提醒", win32con.MB_OK)
2、加载图片,将它转换为灰阶,轻度模糊,然后二值化处理。
class cardReading(object):

    # 机读卡信息读取
    def reading(self, url, count):
        # 加载图片,将它转换为灰阶,轻度模糊,然后边缘检测。
        image = cv2.imread(url)

        #转换为灰度图像
        gray = cv2.cvtColor(image, cv2.COLOR_BGR2GRAY)
        #高斯滤波
        blurred = cv2.GaussianBlur(gray, (7, 7), 0)
        #自适应二值化方法
        blurred=cv2.adaptiveThreshold(blurred,255,cv2.ADAPTIVE_THRESH_MEAN_C,cv2.THRESH_BINARY,51,2)

三、识别图像边缘,找出四点,进行四点变换的图像裁切
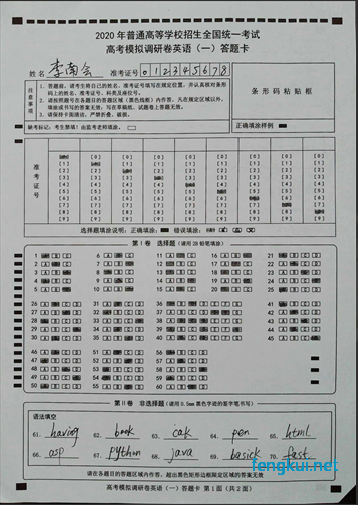
图像裁切的目的是将图像定个便于识别的样子(类似上篇中的扫描图),
比如这里四角变换结束以后会吧图像变为5000*7000的大小,
无论是什么样的案例图片,都是这个格式,这样最后在局部分割,
如选择题答案的识别和学号的确定这套程序才能有较好的通用性。
1、图像边缘识别
edged = cv2.Canny(blurred, 75, 200)
# 从边缘图中寻找轮廓,然后初始化答题卡对应的轮廓
'''
findContours
image -- 要查找轮廓的原图像
mode -- 轮廓的检索模式,它有四种模式:
    cv2.RETR_EXTERNAL  表示只检测外轮廓
    cv2.RETR_LIST 检测的轮廓不建立等级关系
    cv2.RETR_CCOMP 建立两个等级的轮廓,上面的一层为外边界,里面的一层为内孔的边界信息。如果内孔内还有一个连通物体,这个物体的边界也在顶层。
    cv2.RETR_TREE 建立一个等级树结构的轮廓。
method --  轮廓的近似办法:
    cv2.CHAIN_APPROX_NONE 存储所有的轮廓点,相邻的两个点的像素位置差不超过1,即max (abs (x1 - x2), abs(y2 - y1) == 1
    cv2.CHAIN_APPROX_SIMPLE压缩水平方向,垂直方向,对角线方向的元素,只保留该方向的终点坐标,例如一个矩形轮廓只需4个点来保存轮廓信息
    cv2.CHAIN_APPROX_TC89_L1,CV_CHAIN_APPROX_TC89_KCOS使用teh-Chinl chain 近似算法
'''
cnts = cv2.findContours(edged, cv2.RETR_EXTERNAL,cv2.CHAIN_APPROX_SIMPLE)
cnts = cnts[1] if imutils.is_cv3() else cnts[0]
docCnt = None
# 确保至少有一个轮廓被找到
if len(cnts) > 0:
    # 将轮廓按大小降序排序
    cnts = sorted(cnts, key=cv2.contourArea, reverse=True)

    # 对排序后的轮廓循环处理
    for c in cnts:
        # 获取近似的轮廓
        peri = cv2.arcLength(c, True)
        approx = cv2.approxPolyDP(c, 0.02 * peri, True)
        # 如果近似轮廓有四个顶点,那么就认为找到了答题卡
        if len(approx) == 4:
            docCnt = approx
            break
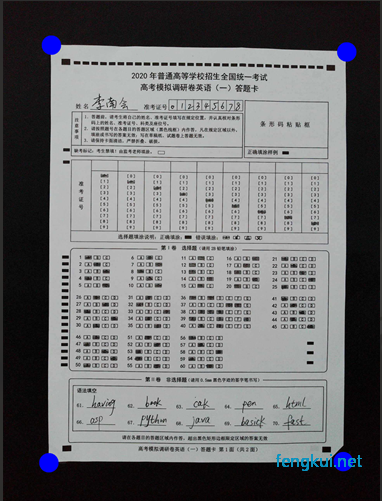
2、顶点坐标处理
因本示例右下角图片不规则,所以需要第一步处理,如果图片规则,可忽略当前操作
# 对右下角坐标点进行处理
bottom_left = bottom_right = None
for x in range(0, len(docCnt)):
    doc = list(docCnt[x][0]);
    doc.append(x)
    if doc[0] < 1000 and doc[1] > 1500:
        bottom_left = doc

    if doc[0] > 1000 and doc[1] > 1500:
        bottom_right = doc

if bottom_left is not None and bottom_right is not None:
    if abs(bottom_right[1] - bottom_left[1]) > 70:
        docCnt[bottom_right[2]][0][1] = bottom_right[1] + 70
    else:
        docCnt[bottom_right[2]][0][0] = bottom_right[0] + 70
第二步操作(必须)
newimage=image.copy()
for i in docCnt:
    #circle函数为在图像上作图,新建了一个图像用来演示四角选取
    cv2.circle(newimage, (i[0][0],i[0][1]), 50, (255, 0, 0), -1)

3、四点变换,直接调用 four_point_transform
paper = four_point_transform(image, docCnt.reshape(4, 2))
warped = four_point_transform(gray, docCnt.reshape(4, 2))

四、对整张机读卡,学号和选择题图像部分预处理
# 对灰度图应用二值化算法
thresh=cv2.adaptiveThreshold(warped,255,cv2.ADAPTIVE_THRESH_MEAN_C,cv2.THRESH_BINARY,53,2)
threshtmmp=thresh

thresh = cv2.resize(thresh, (5000, 7000), cv2.INTER_LANCZOS4)
fImage = cv2.resize(paper, (5000, 7000), cv2.INTER_LANCZOS4)
# paper 用来标记边缘检测,所以建一个来保存
paperorign = paper
warped = cv2.resize(warped, (5000, 7000), cv2.INTER_LANCZOS4)

ChQImg = cv2.blur(thresh, (40, 40))
ChQImg = cv2.threshold(ChQImg, 25, 225, cv2.THRESH_BINARY)[1]
五、寻找结果中黑块坐标
# 在二值图像中查找轮廓
cnts = cv2.findContours(ChQImg, cv2.RETR_TREE, cv2.CHAIN_APPROX_SIMPLE)
cnts = cnts[1] if imutils.is_cv3() else cnts[0]

questionCnts = []
Answer = []

for c in cnts:
    # 计算轮廓的边界框,然后利用边界框数据计算宽高比
    (x, y, w, h) = cv2.boundingRect(c)
    if ((y>3320 and y<5400) or (y>2090 and y<3100)) and x > 400 and x < 4730 and w > 60 and h > 20:
        M = cv2.moments(c)
        cX = int(M["m10"] / M["m00"])
        cY = int(M["m01"] / M["m00"])
        #绘制中心及其轮廓
        cv2.drawContours(fImage, c, -1, (0, 0, 255), 5, lineType=0)
        cv2.circle(fImage, (cX, cY), 7, (255, 255, 255), -1)
        #保存题目坐标信息
        Answer.append((cX, cY))

六、循环坐标计算用户学号、选择题题号及答案
1、将学号坐标与选择题坐标区分开来
# 学号相关坐标系
xt0=[0,688,1120,1570,2005,1450,2890,3340,3783,4240,4680,5000]
yt0=[2090,2220,2320,2410,2510,2600,2705,2795,2900,2990,3100]
# 选择题相关坐标系
xt1=[0,550,715,860,1016,1165,1435,1585,1735,1880,2025,2315,2455,2610,2770,2925,3075,3225,3380,3530,3700,3860,4015,4170,4325,4480,5000]
yt1=[3400,3600,3725,3845,3955,4100,4280,4390,4505,4620,4785,4935,5055,5175,5290,5450]

student = []
IDAnswer = []
for i in Answer:
    # 学号坐标列表
    if i[1] > yt0[0] and i[1] < yt0[-1]:
        student.append(i)
    # 选择题相关坐标答案计算
    else :
        for j in range(0,len(xt1)-1):
            if i[0]>xt1[j] and i[0]<xt1[j+1]:
                for k in range(0,len(yt1)-1):
                    if i[1]>yt1[k] and i[1]<yt1[k+1]:
                        option = self.judge0(j, k, i[0], i[1])
                        IDAnswer.append(option)
2、计算用户学号(采用冒泡排序的方法)
xuehao = '';
for i in self.bubble_sort(student):
    for k in range(0,len(yt0)-1):
        if i[1]>yt0[k] and i[1]<yt0[k+1]:
            xuehao += str(k)

# 冒泡排序
    def bubble_sort(self, list):
        count = len(list)
        for i in range(count):
            for j in range(i + 1, count):
                if list[i] > list[j]:
                    list[i], list[j] = list[j], list[i]
        return list
3、集中处理信息,将数据进行返回
IDAnswer.sort()
newIDAnswer = {'学号':str(xuehao)}
for x in IDAnswer:
    if x[0] <= 60:
        if x[0] not in newIDAnswer:
            answer = x[1]
        else :
            answer = newIDAnswer[x[0]] + x[1]

        newIDAnswer[x[0]] = answer;

# print(xuehao)
# print(newIDAnswer)
return newIDAnswer
七、接收数据,保存到excel中
with open('names.csv', 'w', newline='') as csvfile:
    fieldnames = list(range(1, 61))
    fieldnames.insert(0,'学号')

    writer = csv.DictWriter(csvfile, fieldnames=fieldnames)
    writer.writeheader() # 注意有写header操作

    for x in range(0,len(url)):
        # print(url[x])
        aaaa = cardReading.reading(url[x], x)
        writer.writerow(aaaa)
        print(aaaa)
        if x == len(url)-1:
            print('已全部读取');
            for i in range(0,3):
                time.sleep(1)
                print('即将关闭...%2d.....' % (3-i));
完整示例代码
# -*- coding: utf-8 -*-
# @Author: [FENG] <1161634940@qq.com>
# @Date:   2020-05-12 12:35:58
# @Last Modified by:   [FENG] <1161634940@qq.com>
# @Last Modified time: 2020-05-31 10:51:59

from imutils.perspective import four_point_transform
import imutils
import cv2
import csv
import os
import re
import time
from PIL import Image
# import tkinter as tk
from tkinter import filedialog
import win32api,win32con

class cardReading(object):

    # 机读卡信息读取
    def reading(self, url, count):
        # 加载图片,将它转换为灰阶,轻度模糊,然后边缘检测。
        image = cv2.imread(url)

        #转换为灰度图像
        gray = cv2.cvtColor(image, cv2.COLOR_BGR2GRAY)
        #高斯滤波
        blurred = cv2.GaussianBlur(gray, (7, 7), 0)
        #自适应二值化方法
        blurred=cv2.adaptiveThreshold(blurred,255,cv2.ADAPTIVE_THRESH_MEAN_C,cv2.THRESH_BINARY,51,2)

        # cv2.imwrite('./%02d.jpg' % count, blurred);

        blurred=cv2.copyMakeBorder(blurred,5,5,5,5,cv2.BORDER_CONSTANT,value=(255,255,255))
        edged = cv2.Canny(blurred, 75, 200)

        cnts = cv2.findContours(edged, cv2.RETR_EXTERNAL,cv2.CHAIN_APPROX_SIMPLE)
        cnts = cnts[1] if imutils.is_cv3() else cnts[0]
        docCnt = None

        # 确保至少有一个轮廓被找到
        if len(cnts) > 0:
            # 将轮廓按大小降序排序
            cnts = sorted(cnts, key=cv2.contourArea, reverse=True)

            # 对排序后的轮廓循环处理
            for c in cnts:
                # 获取近似的轮廓
                peri = cv2.arcLength(c, True)
                approx = cv2.approxPolyDP(c, 0.02 * peri, True)
                # 如果近似轮廓有四个顶点,那么就认为找到了答题卡
                if len(approx) == 4:
                    docCnt = approx
                    break

        # 对右下角坐标点进行处理
        bottom_left = bottom_right = None
        for x in range(0, len(docCnt)):
            doc = list(docCnt[x][0]);
            doc.append(x)
            if doc[0] < 1000 and doc[1] > 1500:
                bottom_left = doc

            if doc[0] > 1000 and doc[1] > 1500:
                bottom_right = doc

        if bottom_left is not None and bottom_right is not None:
            if abs(bottom_right[1] - bottom_left[1]) > 70:
                docCnt[bottom_right[2]][0][1] = bottom_right[1] + 70
            else:
                docCnt[bottom_right[2]][0][0] = bottom_right[0] + 70

        newimage=image.copy()
        for i in docCnt:
            cv2.circle(newimage, (i[0][0],i[0][1]), 50, (255, 0, 0), -1)

        # cv2.imwrite('./%02d.jpg' % count, newimage);

        paper = four_point_transform(image, docCnt.reshape(4, 2))
        warped = four_point_transform(gray, docCnt.reshape(4, 2))
        # cv2.imwrite('./%02d.jpg' % count, paper);

        # 对灰度图应用二值化算法
        thresh=cv2.adaptiveThreshold(warped,255,cv2.ADAPTIVE_THRESH_MEAN_C,cv2.THRESH_BINARY,53,2)
        threshtmmp=thresh

        thresh = cv2.resize(thresh, (5000, 7000), cv2.INTER_LANCZOS4)
        fImage = cv2.resize(paper, (5000, 7000), cv2.INTER_LANCZOS4)
        # paper 用来标记边缘检测,所以建一个来保存
        paperorign = paper
        warped = cv2.resize(warped, (5000, 7000), cv2.INTER_LANCZOS4)

        ChQImg = cv2.blur(thresh, (40, 40))
        ChQImg = cv2.threshold(ChQImg, 25, 225, cv2.THRESH_BINARY)[1]

        # 在二值图像中查找轮廓
        cnts = cv2.findContours(ChQImg, cv2.RETR_TREE, cv2.CHAIN_APPROX_SIMPLE)
        cnts = cnts[1] if imutils.is_cv3() else cnts[0]

        questionCnts = []
        Answer = []

        for c in cnts:
            # 计算轮廓的边界框,然后利用边界框数据计算宽高比
            (x, y, w, h) = cv2.boundingRect(c)
            if ((y>3320 and y<5400) or (y>2090 and y<3100)) and x > 400 and x < 4730 and w > 60 and h > 20:
                M = cv2.moments(c)
                cX = int(M["m10"] / M["m00"])
                cY = int(M["m01"] / M["m00"])
                #绘制中心及其轮廓
                cv2.drawContours(fImage, c, -1, (0, 0, 255), 5, lineType=0)
                cv2.circle(fImage, (cX, cY), 7, (255, 255, 255), -1)
                #保存题目坐标信息
                Answer.append((cX, cY))

        # cv2.imwrite('./%02d.jpg' % count, fImage);

        xt0=[0,688,1120,1570,2005,1450,2890,3340,3783,4240,4680,5000]
        yt0=[2090,2220,2320,2410,2510,2600,2705,2795,2900,2990,3100]

        xt1=[0,550,715,860,1016,1165,1435,1585,1735,1880,2025,2315,2455,2610,2770,2925,3075,3225,3380,3530,3700,3860,4015,4170,4325,4480,5000]
        yt1=[3400,3600,3725,3845,3955,4100,4280,4390,4505,4620,4785,4935,5055,5175,5290,5450]

        student = []
        IDAnswer = []
        for i in Answer:
            if i[1] > yt0[0] and i[1] < yt0[-1]:
                student.append(i)
            else :
                for j in range(0,len(xt1)-1):
                    if i[0]>xt1[j] and i[0]<xt1[j+1]:
                        for k in range(0,len(yt1)-1):
                            if i[1]>yt1[k] and i[1]<yt1[k+1]:
                                option = self.judge0(j, k, i[0], i[1])
                                IDAnswer.append(option)

        xuehao = '';
        for i in self.bubble_sort(student):
            for k in range(0,len(yt0)-1):
                if i[1]>yt0[k] and i[1]<yt0[k+1]:
                    xuehao += str(k)

        IDAnswer.sort()
        newIDAnswer = {'学号':str(xuehao)}
        for x in IDAnswer:
            if x[0] <= 60:
                if x[0] not in newIDAnswer:
                    answer = x[1]
                else :
                    answer = newIDAnswer[x[0]] + x[1]

                newIDAnswer[x[0]] = answer;

        # print(xuehao)
        # print(newIDAnswer)
        return newIDAnswer

    # 冒泡排序
    def bubble_sort(self, list):
        count = len(list)
        for i in range(count):
            for j in range(i + 1, count):
                if list[i] > list[j]:
                    list[i], list[j] = list[j], list[i]
        return list

    # 图片预览
    def see_img(self, image):
        cv2.namedWindow("image",0);
        cv2.resizeWindow("image", 480, 640);
        cv2.imshow("image", image)
        cv2.waitKey(0)
        exit()

    # 卷子model0判题
    def judgey0(self, y):
        if (y / 5 < 1):
            return  y + 1
        elif y / 5 < 2 and y/5>=1:
            return y % 5 + 25 + 1
        else:
            return y % 5 + 45 + 1

    # 获取选项
    def judgex(self, x, y=1):
        letter = 'ABCDEFGHIJKLMNOPQRSTUVWXYZ'
        return letter[x%(5*y)-1]

    # 获取目录下的文件
    def print_all_file_path(self, init_file_path, keyword='jpg'):
        url = []
        for cur_dir, sub_dir, included_file in os.walk(init_file_path):
            if included_file:
                for file in included_file:
                    if re.search(keyword, file):
                        url.append(cur_dir + "/" + file)
        return url

    # 题号与对应选项进行处理
    def judge0(self, x, y, m, n):
        # score = 20
        if n > 4140 and n < 4800:
            if x/5<1 :
                num = self.judgey0(y)
            elif x/5<2 and x/5>=1:
                num = self.judgey0(y)+5
            elif x/5<4 and x/5>=2:
                num = self.judgey0(y)+10
            else:
                num = self.judgey0(y)+15
        else:
            if x/5<1 :
                num = self.judgey0(y)
            elif x/5<2 and x/5>=1:
                num = self.judgey0(y)+5
            elif x/5<3 and x/5>=2:
                num = self.judgey0(y)+10
            elif x/5<4 and x/5>=3:
                num = self.judgey0(y)+15
            else:
                num = self.judgey0(y)+20

        if m > 2050 and m < 3720 and n > 4140 and n < 4800:
            option = self.judgex(x, 2)
        else:
            option = self.judgex(x, 1)

        return [num, option]


if __name__=="__main__":
    cardReading = cardReading()
    url = cardReading.print_all_file_path("./card");
    if len(url) == 0:
        Folderpath = filedialog.askdirectory()  # 获得选择好的文件夹
        url = cardReading.print_all_file_path(Folderpath);
        # print(url)

    if len(url) > 0:
        # for x in range(0,len(url)):
        #     # print(url[x])
        #     aaaa = cardReading.reading(url[x], x)
        #     print(aaaa)

        with open('names.csv', 'w', newline='') as csvfile:
            fieldnames = list(range(1, 61))
            fieldnames.insert(0,'学号')

            writer = csv.DictWriter(csvfile, fieldnames=fieldnames)
            writer.writeheader() # 注意有写header操作

            for x in range(0,len(url)):
                # print(url[x])
                aaaa = cardReading.reading(url[x], x)
                writer.writerow(aaaa)
                print(aaaa)
                if x == len(url)-1:
                    print('已全部读取');
                    for i in range(0,3):
                        time.sleep(1)
                        print('即将关闭...%2d.....' % (3-i));
    else:
        win32api.MessageBox(0, "未选择识别目录", "提醒", win32con.MB_OK)
原始高拍仪图片:

本文为冯奎原创文章,转载无需和我联系,但请注明来自冯奎博客fengkui.net
- 上一篇: opencv+python机读卡识别(初级版)
- 下一篇: PHP图片不变形处理(留白与截取)

请先登录后发表评论
- latest comments
- 总共0条评论
最新评论